Water Leak Under a Concrete Floor: How It's Found and Fixed (Without Digging Up the Whole Room)
A leak beneath a solid floor rarely shows itself where the water actually escapes. Here is how concrete and screed floors hide leaks, how a leak is pinpointed through the slab without breaking it open, and how the repair is kept to a single small access hole.
A water leak under a concrete floor is one of the most stressful problems a London homeowner can face, largely because everything you can see about it is misleading. The damp patch, the warm spot, the faint smell of moisture; none of these sit directly above the point where water is actually escaping. Water travels along the path of least resistance beneath a solid floor, so by the time it surfaces it may be a metre or more from the failed joint or pinhole. This is exactly why the instinct to grab a breaker and open up the floor where it looks wet so often ends in a wrecked room and an unfixed leak.
This guide explains why solid floors hide leaks so effectively, which symptoms actually mean something, and how a modern leak detection specialist in London locates the precise point of failure through the slab using several methods together. It also covers the repair options once the leak is pinpointed, the honest factors that drive cost, and the specific complications that come with underfloor heating.
Why concrete and screed floors hide leaks so well
Most solid floors in London homes are built up in layers: a compacted base, a concrete slab, a damp-proof membrane, insulation in newer builds, and then a sand-and-cement screed on top that carries the tiles, wood or vinyl you actually walk on. Pipework for hot and cold supply, and for central heating, is frequently buried within or beneath that screed layer. When a buried pipe fails, the water does not rise straight up. It spreads sideways through the screed, tracks along the line of the pipe, pools against the damp-proof membrane, and follows any dip in the slab.
The result is that the visible symptom and the actual source can be far apart. Concrete is also porous enough to wick moisture over a wide area, which blurs the picture further. A warm patch from a heating leak, for instance, marks where hot water has spread, not where the pipe has split. Reading the floor by eye alone is guesswork, and guesswork under a solid floor is expensive.
The symptoms worth paying attention to
Some signs are more diagnostic than others. The ones that genuinely point to a concealed leak under a solid floor include:
- A warm patch on the floor that has no business being warm, often felt through bare feet or noticed by a pet choosing to lie there. This almost always indicates a hot supply or heating leak.
- A persistent damp edge or tide mark where the floor meets a skirting board, wall or doorway, especially if it does not dry out after normal ventilation.
- A boiler or heating system that loses pressure and needs topping up repeatedly, with no visible leak on any radiator, valve or exposed pipe.
- Lifting, cupping or discoloured flooring, such as tiles that sound hollow when tapped, laminate that has swollen at the joints, or vinyl that has bubbled.
- An unexplained rise in your metered water use, or the water meter creeping upward when every tap and appliance is off.
- A musty smell that lingers in one part of a room even after cleaning.
Any one of these on its own can have an innocent explanation. Two or three together, particularly a warm patch combined with dropping pressure or a rising meter, strongly suggest water is escaping beneath the slab.
How the leak is located through the slab, not through a breaker
The whole point of professional leak detection is to replace destruction with information. Rather than opening the floor to look, a specialist gathers evidence from the surface and only breaks in once the point of failure is known to within a small margin. No single instrument is definitive on its own, which is why a careful survey layers several methods and cross-checks them. When two or three independent techniques agree on the same spot, confidence is high enough to commit to a single access point.
Acoustic detection
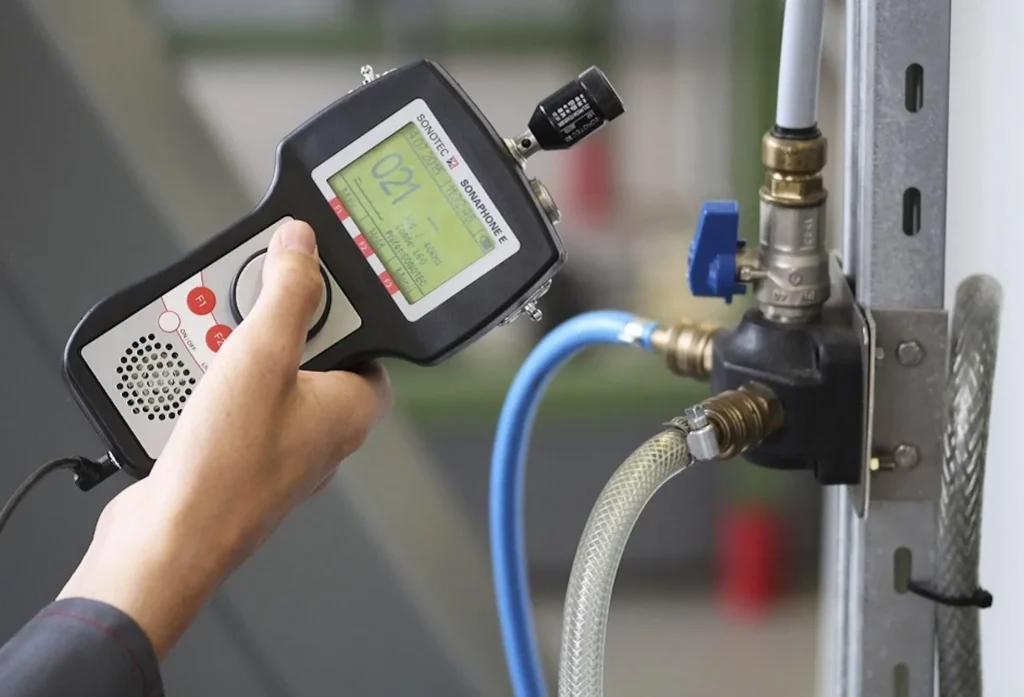
Pressurised water escaping from a pipe makes a sound, a hiss or a rushing note at the point of the breach, and that sound conducts through the pipe, the water and the surrounding concrete. Using sensitive ground microphones and correlation equipment, a technician listens across the floor and identifies where the noise is loudest and clearest. On a pressurised supply pipe this is often the single most powerful method. Our own approach to acoustic leak detection in London uses electronic amplification to separate the leak signature from background noise, which matters a great deal in a busy home or flat.
Thermal imaging
A thermal camera reads surface temperature. A hot water or heating leak warms the floor above and around it, producing a plume that the camera renders visible. A cold mains leak can show the opposite, a cooler footprint where water is drawing heat away. Thermal imaging is fast and completely non-contact, making it excellent for narrowing a search area quickly. Its limitation is that it shows where heat has spread rather than the exact pinhole, so it is used to guide the other methods rather than to make the final call alone.
Tracer gas
When a leak is small, intermittent, or on a pipe that can be isolated and drained, tracer gas is often the deciding method. A safe, inert mix, typically hydrogen with nitrogen, is introduced into the emptied pipe. Being extremely light, the gas escapes through the exact point of failure and rises up through the screed and floor covering, where a highly sensitive detector picks it up at the surface. Because the gas can only leave through the breach, it pinpoints the location with real precision, which is why it is invaluable on floors where acoustic noise is muffled or the leak is barely running.
Supporting checks
Alongside these, a good survey uses moisture meters to map the spread of dampness, a pressure test to confirm a leak exists and to tell supply from heating, and sometimes pipe and cable tracing to map where buried services actually run. It is this combination, rather than any one gadget, that lets a specialist mark a spot on the floor and say with confidence that the pipe fails there.
| Method | Best suited to | Strengths | Limitations |
|---|---|---|---|
| Acoustic detection | Pressurised supply pipes under screed or concrete | Pinpoints the noise source precisely; works through solid floors | Struggles with very low pressure or gravity heating leaks; disturbed by background noise |
| Thermal imaging | Hot water and underfloor heating leaks | Fast, non-contact, covers a large area quickly | Shows heat spread, not the exact point; needs a temperature difference |
| Tracer gas | Small, intermittent or isolatable pipe leaks | Very high precision; works where acoustics are muffled | Requires the pipe to be drained and charged with gas |
| Moisture mapping | Understanding how far water has spread | Defines the affected area and dampness gradient | Indicates spread, not the source |
| Pressure testing | Confirming a leak and identifying the system | Proves whether the loss is on supply or heating | Confirms that a leak exists but not where |
Why speculative digging is a mistake
When a floor is opened where it looks wettest, one of two things usually happens. Either the pipe under that spot is intact, because the water tracked there from elsewhere, and a second hole is needed; or several holes are chased before the real fault is found. Every opening in a solid floor means breaking the screed, cutting through tile or wood, disturbing insulation and the damp-proof membrane, and then reinstating all of it. The damage compounds quickly, and none of it addresses the leak until the actual point is reached.
Speculative digging also risks striking other buried services, heating pipes, mains water, sometimes electrical conduit, that were never the problem. The financial logic is simple: a survey that costs a fixed fee protects a floor whose reinstatement could run into far more. Detecting first, then opening once, is almost always the cheaper route as well as the less destructive one. This is the whole reason our detection work leads with instruments and ends with a single, deliberate access hole rather than exploratory breaking.
Repair options once the point is pinpointed
Knowing exactly where the pipe fails opens up repair choices that are impossible when the location is a guess. Which one is appropriate depends on the pipe material, how deep it sits, its age, and whether it is a supply or heating line.
- Localised access and repair. The most common outcome for a single defect. A small section of floor is opened directly over the pinpointed fault, the damaged length of pipe is cut out and replaced or the joint remade, the pipe is pressure-tested, and the floor is reinstated. Because the opening is small and precisely placed, disruption is contained.
- Re-routing the pipe. Where a buried pipe is old, has already failed once, or sits awkwardly deep, it can make more sense to abandon the buried run and route a new pipe around the wall or through an adjacent space. This avoids repeated excavation of the slab and can be quicker to reinstate.
- Pipe relining or repair coupling. On certain pipe types and defects, specialist couplings or lining techniques allow a repair with minimal excavation. Suitability is narrow and depends on the specific pipe, so this is assessed case by case rather than assumed.
In each case the sequence is the same: pinpoint, open a single access point, repair, test under pressure to confirm the fix holds, and reinstate. A leak that has been properly located should never require the room to be lifted wholesale.
What drives the cost
Honest pricing starts with being clear that every job differs. That said, the factors that move the figure are consistent and worth understanding. As a general guide, professional leak detection in London tends to fall within typical UK trade cost-guide ranges of a few hundred pounds for the detection survey, with the repair costed separately once the fault is known. The main cost drivers are:
- How accessible the pipe is. A leak under thin screed with a vinyl covering is far cheaper to reach and reinstate than one beneath thick concrete finished in stone tiles.
- The floor finish. Reinstating natural stone, hardwood or a poured resin floor costs more, and matching existing materials can add both time and expense.
- Depth and pipe material. Deeper pipes mean more excavation; older or unusual pipe materials may need particular fittings.
- Whether it is supply or heating. Heating leaks can involve draining and refilling the system and rebalancing it afterwards.
- Complexity of detection. A clear acoustic leak is quick to find; an intermittent one that needs tracer gas and multiple visits takes longer.
We keep this transparent by working on a no find, no fee basis for detection and by agreeing a fixed fee at the point of booking, so you know the detection cost before anyone arrives. Any repair is quoted separately once the fault is understood, with no obligation.
Underfloor heating: the specific case
Leaks in underfloor heating deserve their own note because the system changes both the symptoms and the method. Underfloor heating circuits are long continuous loops of pipe embedded in the screed, and a leak on one of these can be genuinely difficult to distinguish from a normal warm floor. The tell-tale signs are a heating system that loses pressure, a zone that never quite reaches temperature, or a patch that stays warm when the system should be off.
Because the whole floor is designed to be warm, thermal imaging has to be used carefully; the technician looks for anomalies in the expected heat pattern rather than warmth as such. Tracer gas comes into its own here, since the circuit can be isolated, drained and charged so the gas escapes only at the breach. Our dedicated approach to underfloor heating leak detection in London combines controlled pressure testing, thermal survey and tracer gas to find the failure in a specific loop without lifting the entire floor. Once located, the damaged section is accessed, repaired, the loop is refilled and bled, and the system is rebalanced so every zone heats evenly again.
The sensible order of events
If you suspect a leak under a solid floor, the order that protects both your floor and your budget is straightforward. Confirm the symptoms, isolate what you can to limit further damage, and bring in detection before any breaking begins. A specialist surveys the floor with acoustic, thermal and tracer gas methods, cross-checks the results, and marks the point of failure. Only then is a single small access hole opened, the pipe repaired, the fix pressure-tested, and the floor reinstated. For a fuller walkthrough of the early diagnosis stage, our guide on how to find a water leak under the floor covers the checks you can make yourself before calling anyone out.
The message throughout is the same. A leak under concrete is not a reason to dig up a room. With the right combination of methods it can be pinpointed through the slab, repaired through one deliberate opening, and put behind you without turning your home into a building site.
Frequently asked questions
Can a leak under a concrete floor really be found without digging?
Yes. The floor does not need to be opened to locate the leak. Acoustic microphones, thermal imaging and tracer gas all read the point of failure through the slab from the surface. When two or more of these methods agree on the same spot, the location is confirmed to a small margin. The floor is only opened once, directly over that point, to carry out the repair.
Why is the damp patch not where the leak is?
Water escaping under a solid floor takes the path of least resistance. It spreads sideways through the screed, tracks along the pipe run and pools against the damp-proof membrane, so it surfaces wherever it can, often a metre or more from the actual breach. This is exactly why opening the floor where it looks wettest so often misses the real fault and leads to extra, needless damage.
How much does it cost to find and fix a leak under a concrete floor?
Detection and repair are costed separately. Detection in London typically falls within standard UK trade cost-guide ranges of a few hundred pounds, and the repair is quoted once the fault is known. Cost is driven by pipe depth, the floor finish, whether the leak is on supply or heating, and how complex the detection proves to be. We work on a no find, no fee basis and agree a fixed detection fee at booking.
How do I know if it is a heating leak or a water supply leak?
A warm patch, a boiler that keeps losing pressure, or a zone that never reaches temperature point to a hot supply or heating leak. A cold, spreading damp area with no temperature change, sometimes alongside a rising water meter, suggests the mains supply. A pressure test settles it by isolating each system in turn, and this distinction shapes which detection method and repair approach are used.
Will underfloor heating make the leak harder to find?
It changes the method rather than making it impossible. Because the whole floor is meant to be warm, thermal imaging is used to spot anomalies in the expected heat pattern rather than warmth alone. Tracer gas is particularly effective, as the affected circuit can be isolated, drained and charged with gas that escapes only at the breach. Once found, the loop is repaired, refilled, bled and rebalanced.
Is speculative digging ever worth it to save money?
Almost never. Opening a solid floor without knowing where the pipe fails usually means breaking through screed, tile and the damp-proof membrane in the wrong place, then repeating that until the fault is found, and risking other buried services along the way. A fixed-fee detection survey costs far less than reinstating an over-broken floor. Detecting first and opening once is both cheaper and far less destructive.