Warm Patch on the Floor? It Could Be a Hidden Hot-Water or Heating Leak
A warm patch on a tiled or concrete floor is rarely random. It usually points to a leaking hot-water or central-heating pipe, or a failed underfloor-heating loop, quietly wasting water and energy under the screed. Here is what it means and how it is found without ripping the floor up.
You walk across the kitchen or hallway in bare feet and notice it: one area of the floor is noticeably warmer than the rest. Sometimes it is a vague warmth you only feel on a cold morning; sometimes it is an obvious hot band running across the room. Either way, a warm patch on a solid floor is worth paying attention to. It is one of the most common early signs of a hidden hot-water or central-heating leak, and it tends to appear weeks or months before you see any water at all.
In this article we explain what a warm patch on the floor usually means, why the same fault often shows up on your boiler pressure gauge and your energy bills, which checks you can safely do yourself, and why leaving it alone is a false economy. We also cover how a professional confirms and pinpoints the leak using non-invasive methods, so the floor only ever gets lifted at the exact spot, if at all.
What a Warm Patch on the Floor Usually Means
Under a typical London solid floor there is a layer of screed or concrete, and running through or beneath it are pipes carrying hot water. These might be central-heating flow and return pipes feeding radiators in another room, hot-water supply pipes buried in the slab, or the loops of a wet underfloor-heating system. When one of these develops a small leak, hot water escapes into the surrounding screed. The screed holds heat well, so it warms up locally and conducts that warmth to the surface. The result is a patch of floor that feels warmer than everywhere around it.
The warmth is essentially free heat leaking out of your system in the wrong place. A pinhole in a copper pipe, a weeping compression joint buried in the floor, a corroded section of steel pipe, or a split in an underfloor-heating loop will all do the same thing. Because the water is hot, the temperature difference gives the leak away long before the volume of water is large enough to reach the surface and show as a damp stain.
Common culprits behind a warm floor
- Central-heating pipes buried in the slab. Flow and return pipes running under the floor to reach radiators elsewhere. A leak here warms the floor and drops your system pressure.
- Hot-water supply pipes in or under the screed. These may only warm the floor when hot water is being drawn, so the patch comes and goes.
- Underfloor-heating loops. A leak in one continuous loop under the screed can create a hot line, an uneven heat pattern, or one zone that never quite reaches temperature.
- Failed joints and fittings. Compression joints, push-fit connectors and manifold tails hidden under the floor that have loosened, corroded or been stressed during the original installation.
It is worth ruling out the innocent explanations first. If the warm area sits directly above a boiler flow pipe, a hot-water cylinder in the room below, or a run of pipework you already know about, the warmth may simply be normal heat transfer rather than a leak. The tell-tale sign of a genuine leak is warmth combined with at least one other symptom: falling pressure, a running noise, higher bills, or damp appearing over time.
Why the Same Fault Causes Pressure Loss and Higher Bills
A sealed central-heating system is meant to hold a steady pressure, usually somewhere around 1 to 1.5 bar when cold. If a pipe under the floor is leaking, water is continuously escaping from that sealed loop, so the pressure on your boiler gauge slowly falls. Many people notice they are topping up the system with the filling loop far more often than they used to. Every top-up is fresh, oxygenated water going in to replace what has leaked away, which also accelerates internal corrosion and sludge.
The energy cost is the part people underestimate. Your boiler is heating water, that water is leaking into the screed, and the heat is being dumped into the floor and the ground instead of your radiators. The boiler then fires more often and for longer to try to hit the temperature you have set, and it reheats the fresh cold water you keep adding. On a hot-water leak, you are paying to heat water that never reaches a tap. None of this shows up as a dramatic spike, which is exactly why it goes unnoticed. It is a slow, steady increase in gas and water usage that many households simply absorb as prices rising.
This is a recurring theme on DIY and home-improvement forums such as r/DIYUK and DIYnot. The broad consensus among experienced posters is consistent: an unexplained warm patch on a solid floor, especially alongside a boiler that keeps losing pressure, points strongly to a buried heating or hot-water leak and is not something to keep patching over with regular top-ups. The general advice is to stop repeatedly repressurising the system, because doing so masks the problem and lets damage carry on out of sight.
Safe Checks You Can Do Yourself
There are a handful of sensible checks you can carry out before calling anyone. None of them involve lifting the floor or taking anything apart, and they help you describe the problem accurately.
- Map the warm area. On a cold morning, walk the floor in bare feet or lightly touch it with the back of your hand. Note where the warmth starts and stops. A defined line often follows a pipe run; a spreading patch often marks a leak point.
- Watch the boiler pressure gauge. Note the cold pressure, then check it again over several days. If it keeps dropping and you keep needing to top up, that is a strong sign of water escaping somewhere in the sealed system.
- Check whether the warmth tracks hot-water use. If the patch gets warmer when you run a hot tap or a bath, the leak is more likely on a hot-water supply pipe than on the heating.
- Listen when the house is quiet. A faint hissing or trickling near the floor, with taps off and heating settled, can indicate water escaping under pressure.
- Look for secondary signs. Lifting or discoloured flooring, a musty smell, tile grout that stays damp, or skirting boards that feel soft near the warm area all support the leak theory.
- Isolate where you safely can. If you have an underfloor-heating manifold with labelled loops, you may be able to see whether one particular zone behaves differently. Do not start dismantling fittings.
What you should not do is try to confirm a buried leak by breaking into the floor yourself. Guesswork excavation is how people end up with several holes in the screed and still no leak found. The value of these checks is in gathering evidence, not in fixing anything.
Why You Should Not Ignore a Warm Patch
It is tempting to live with a warm patch, especially if there is no visible water yet. The problem is that a buried hot-water leak never improves on its own. It does one of two things: it stays small and quietly wastes energy and water for months, or it grows and starts causing structural damage. Usually it does both.
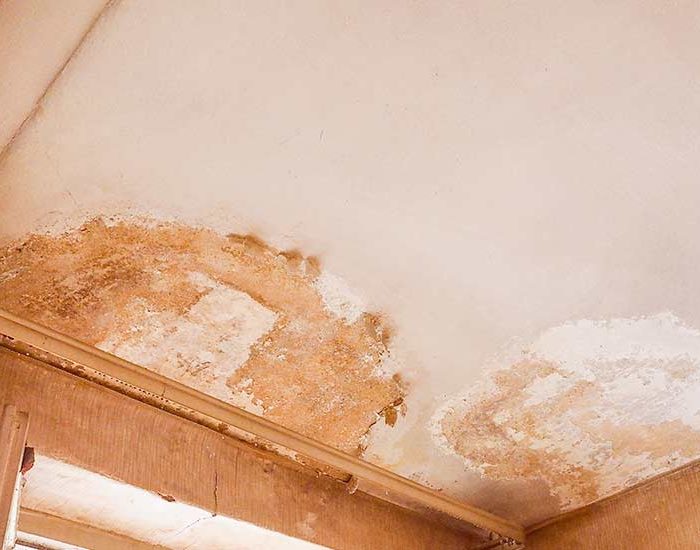
Left running, the escaping water saturates the screed and works into the floor build-up. Over time this can lift tiles and laminate, rot timber battens and skirtings, blow plaster on adjoining walls, and create the damp, warm conditions that mould thrives in. What began as a pinhole that a plumber could have addressed cleanly turns into a floor covering that needs replacing and a screed that needs drying out. The repair cost multiplies the longer it is left.
There is also the running cost that never stops. Every week the leak continues, you are paying to heat water that goes nowhere useful, and topping up a system that keeps corroding from the inside. The energy waste alone often outweighs the cost of a proper investigation within a season or two. Acting early is not just about avoiding damage; it is usually the cheaper path overall.
How Professionals Confirm and Pinpoint the Leak
The goal of a professional leak investigation is simple: find exactly where the leak is before anyone touches the floor. A good leak-detection approach is non-invasive and uses more than one method, cross-checking the results so the leak is located precisely rather than guessed at. Here is how that typically works for a warm-patch case.
Thermal imaging under load
A thermal-imaging camera reads surface temperature and turns it into a heat map of the floor. With the heating or hot water running so the leak is actively warming the screed, the camera shows the heat pattern clearly. A normal pipe run appears as an even warm line; a leak usually shows as a hotter, spreading bloom where water is pooling in the screed. Thermal imaging is excellent for narrowing down the area quickly and non-destructively, and it is particularly effective on underfloor heating because the whole loop is warm and any anomaly stands out.
Tracer gas
When the exact point needs confirming, tracer gas is one of the most reliable tools available. A safe gas mixture, usually hydrogen and nitrogen, is introduced into the drained pipework. Being very light, the gas escapes through the leak point, travels up through the screed and floor covering, and is picked up at the surface by a sensitive detector. This pinpoints the leak to within centimetres and is especially useful when a leak is small, intermittent, or hidden under a floor where thermal patterns alone are not conclusive.
Per-circuit pressure testing
Pressure testing confirms whether a system is losing water and helps isolate which part is at fault. By pressurising individual circuits or underfloor-heating loops separately and watching whether each one holds, the engineer can determine exactly which run is leaking. This is invaluable on multi-loop underfloor systems, where it turns a whole-floor search into a single suspect loop before any other method is applied.
Acoustic and moisture checks
Acoustic listening equipment can detect the sound of water escaping under pressure, which helps on pressurised hot-water leaks. Moisture meters confirm where water has actually spread through the floor. Used alongside thermal imaging and tracer gas, these build a consistent picture that points to one spot.
The reason for combining methods is accuracy. Any single technique can be misled by the way heat and water move through a floor. When thermal imaging, tracer gas and pressure testing all agree on the same location, you can lift the floor once, at the right place, and find the leak underneath. That is the difference between a targeted repair and an exploratory demolition.
Typical cost expectations
Costs vary with property size, floor construction and how buried the pipework is. The figures below are typical UK trade cost-guide ranges to help you set expectations, not quotes.
| Service | Typical UK trade cost-guide range | What it involves |
|---|---|---|
| Non-invasive leak detection survey | Around £300 to £600 | Thermal imaging, tracer gas, pressure testing and moisture checks to locate the leak |
| Underfloor-heating leak location | Around £350 to £700 | Per-loop pressure testing plus thermal and tracer-gas pinpointing under screed |
| Access and exposure of leak point | Around £150 to £400 | Lifting a small, targeted area of flooring or screed once located |
| Pipe or joint repair once exposed | Around £150 to £500 | Repairing or replacing the failed section of pipe or fitting |
Because every situation differs, the sensible approach is a fixed fee agreed at the point of booking so you know the cost of the investigation before work starts. On our side, detection is offered on a no find, no fee basis and the fee is fixed when you book, so there are no surprises and no open-ended hourly charges.
How This Applies to London Homes
A large share of London housing has solid ground floors, buried heating pipes and, increasingly, wet underfloor heating in extensions and refurbishments. Period conversions often have decades-old pipework hidden under later screed and tiling, while newer builds and loft or kitchen extensions frequently run underfloor-heating loops that are impossible to inspect by eye. In both cases, a warm patch is often the first and only clue that something under the floor has failed.
The right response is the same across property types: confirm the leak with non-invasive methods, pinpoint it precisely, and only then open the floor. If you would like to understand the wider process, our overview of leak detection in London explains the equipment and approach. For heat-related faults specifically, see our pages on underfloor-heating leak detection and central-heating leak detection, which cover the per-loop and per-circuit techniques used to isolate exactly where a heating leak is coming from.
The Bottom Line
A warm patch on the floor is your system telling you that hot water is going somewhere it should not. More often than not it is a leaking hot-water or heating pipe, or a failed underfloor-heating loop, quietly draining pressure and pushing up your bills while damp builds under the surface. The good news is that it is highly findable. With thermal imaging under load, tracer gas and per-circuit pressure testing, the leak can be located to within centimetres without tearing up the floor first. Catch it early, have it confirmed properly, and you turn a potential floor-replacement job into a small, targeted repair.
Frequently asked questions
Is a warm patch on the floor always a leak?
Not always. Warmth directly above a known pipe run, a boiler flow pipe or a hot-water cylinder below can be normal heat transfer. It is far more likely to be a leak when the warmth appears alongside other symptoms, such as your boiler losing pressure, higher bills, a faint running sound, or damp developing over time. If more than one of those is present, it is worth investigating.
Why does my boiler keep losing pressure if the leak is under the floor?
A central-heating system is a sealed loop that should hold a steady pressure. If a buried pipe is leaking, water continuously escapes from that loop, so the pressure on the gauge falls and you find yourself topping up more and more often. Repeatedly repressurising masks the problem and lets the leak keep causing damage, so it is better to have the cause found than to keep refilling.
Can you find the leak without lifting my floor?
Yes, that is the whole point of non-invasive leak detection. Thermal imaging, tracer gas, pressure testing and moisture readings are used together to locate the leak to within centimetres while the floor is still intact. The floor is only opened once, at the confirmed spot, which avoids exploratory holes and keeps disruption and cost to a minimum.
How is an underfloor-heating leak located?
Underfloor heating is made up of continuous loops under the screed. Each loop can be pressure tested separately at the manifold to find which one is losing water, then thermal imaging and tracer gas pinpoint the exact leak position along that loop. Isolating a single loop first turns a whole-floor search into a precise, targeted location job.
How much does it cost to find a warm-floor leak in London?
As a guide, a non-invasive detection survey typically falls in the region of a few hundred pounds, with underfloor-heating location often a little higher because of the per-loop testing involved. These are typical UK trade cost-guide ranges rather than quotes. We work to a fixed fee agreed when you book, on a no find, no fee basis, so you know the cost of the investigation before any work starts.
What happens if I just leave the warm patch alone?
It will not fix itself. A buried hot-water leak keeps wasting energy and water every day, and over time the escaping water saturates the screed, lifts tiles or laminate, rots timber and skirtings, blows plaster and encourages mould. A pinhole that could have been a small repair becomes a floor and screed replacement. Acting early is almost always cheaper than waiting.